Introduction to
Selenium
·
Selenium is an open-source testing framework for
web applications. It is used to automate the web applications.
·
Selenium is compatible with the following
browsers
- Firefox
- IE
- Chrome
- Safari
- Opera
·
Selenium works with following Programming
Languages
- C#
- Java
- Perl
- Python
- Ruby
Selenium-Components
·
Selenium - IDE
·
Selenium – RC
·
Selenium Webdriver
·
Selenium Grid
Selenium IDE
Ø Selenium
IDE is a plugin to Firefox.
Ø It
is a tool to record and playback tests (like Win Runner, QTP).
Selenium RC (Remote Control)
Ø Test
tool that allows you to write automated web application UI tests in any programming language against any HTTP
website.
Ø Support
multiple browsers.
Selenium Grid
Ø Selenium
Grid provides a hub allowing the running of multiple Selenium tests
concurrently on any number of local or remote systems, thus minimizing test execution
time.
Why Selenium
Webdriver or RC , not IDE?
Ø The
main limitation of Selenium IDE is that it is supported in only Firefox browser
Ø Selenium
RC and Webdriver Supports Multiple
Browser
Ø Selenium
RC also has its limitation that it needs to start selenium server before
starting running the test.
Ø So
to overcome all these issues a new version was introduced “Selenium
Webdriver”.
Selenium Webdriver
requirements:
To start up with
automation using selenium, we need IDE like Eclipse to write the scripts. Below
are the initial steps to do.
Step1: Install Java on your computer.
Download
and install the Java Software Development Kit (JDK) .
Step2: Install Eclipse IDE.
Download
as a Zip file.
Inside
the Zip file, there is an “Eclipse” folder.
Step3: Download Selenium-Server-Standalone-2.25.0 jar
Step4: Configure Eclipse with selenium webdriver.
Configuration
Eclipse-Selenium Webdriver
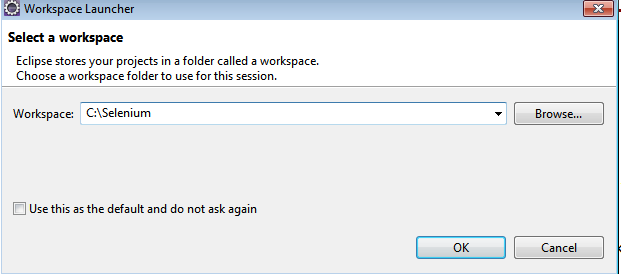
Ø Launch
the "eclipse.exe" file inside the "eclipse" folder.
Ø It
will ask to create workspace.
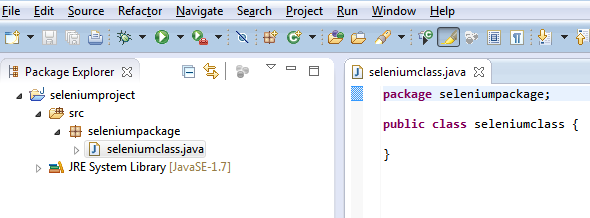
Ø Create
a new project through File > New > Java Project.
Ø Name
the project as “seleniumproject".
Ø Right-click
on the newly created project and select New > Package, and name that package
as “seleniumpackage“
Ø Create
a new java class under “seleniumpackage” . Right click the package, and then
select New > Class and name it as “seleniumclass”.
Ø Once
you completed all the above steps, your Eclipse IDE will look like
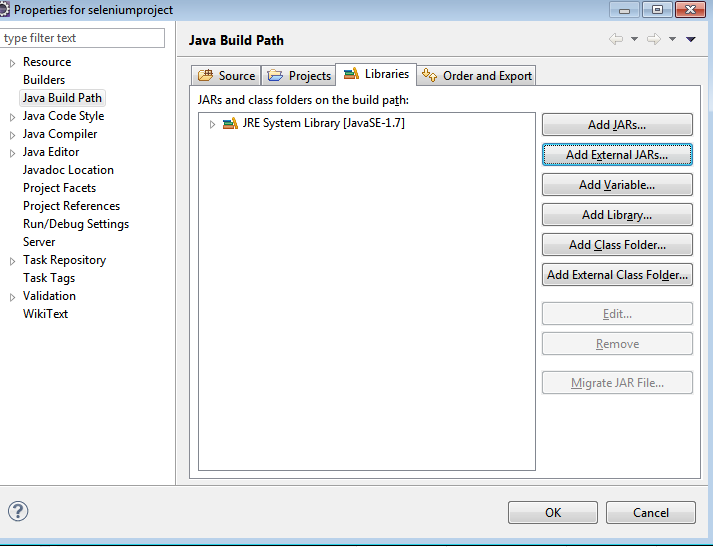
Ø Import
the selenium standalone jar to the project
Ø Right
click on the project > Bulid path> configure Build path > Libraries
>Add External Jars .
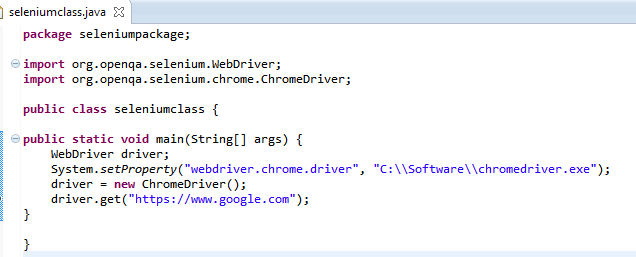
Sample script with
Selenium Webdriver:
Ø To Open Google Page:
Selenium Webdriver API:
Ø In
the above script “driver.get” is one of the API’s of webdriver.
Ø API
Means “Application program Interface”.
Ø API
is a set of protocols, routines and tools for building software application.
SOME IMPOTTANT API:
Ø driver.get
Ø driver.findelement
Ø By.id,
By.linkText…
Ø driver.click
Ø driver.sendkeys
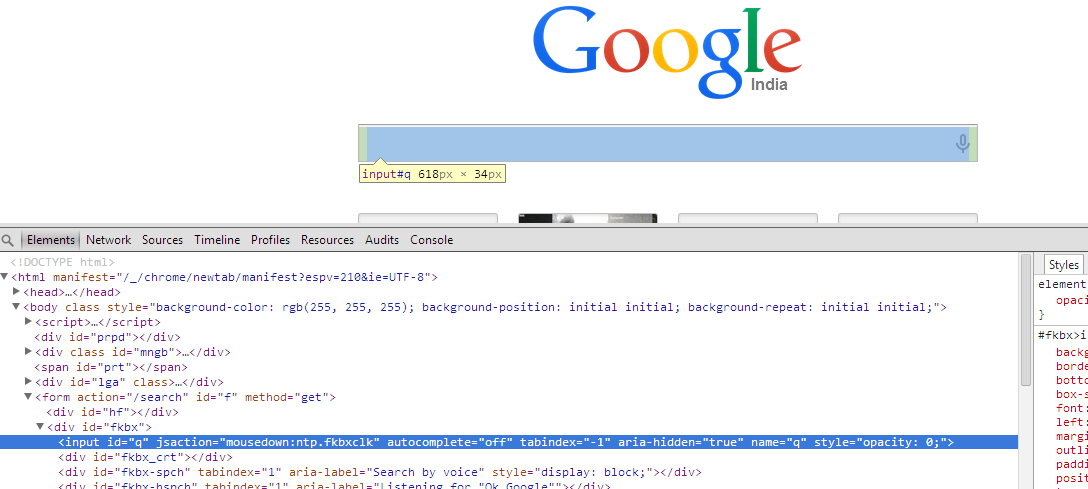
Let’s see how to search something in google:

Ø In the above script “driver.findElement(By.id("gbqfq")).sendKeys("selenium
for beginners");” “gbqfq” is a locator.
Ø So,
What is Locator?
Ø Locator
is HTML element to find and match the elements of your page that it needs to
interact with.
Ø How
to find the locators.?
Find Locator:
Ø Open
your application Ex: Google
Ø Press
F12.